Rick's
Virtual Model of an Alligator Den!
This page
created 5/27/2022 last update: 6/15/2022
All text, images, etc. on this page ©2022 Richard Dashnau
mouse scroll = zoom in/out
left mouse + drag = roll model
right mouse + drag = pan model [ or ] control+left mouse+drag = pan model
up/down keys = tilt model up/down
left/right keys = turn model left/right
This
page is going through development. I created the components of
this assembly in Solidworks. At my job, I'd used that program with some
success. I've wanted to model alligator dens and
other
natural objects for a long time, but could not use my work account for
this. But I've just discovered that Solidworks has a
"makers" tier that
gives access to a full version of the program
(Solidworks connected 3D experience) for a very affordable cost (at
least for now). So I've modeled an alligator den. I've tried this
before (in 2013), with various
freeware programs, and the results
are on this page. I hoped to do better
with Solidworks.
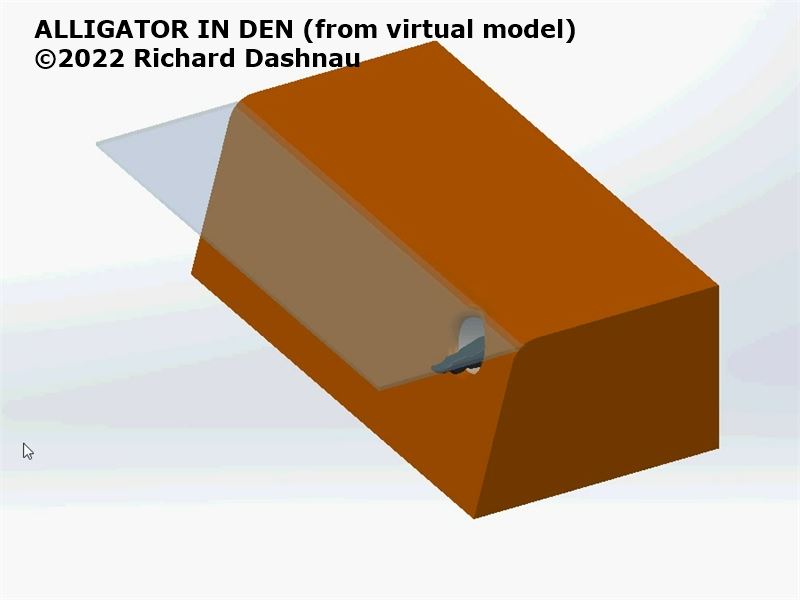
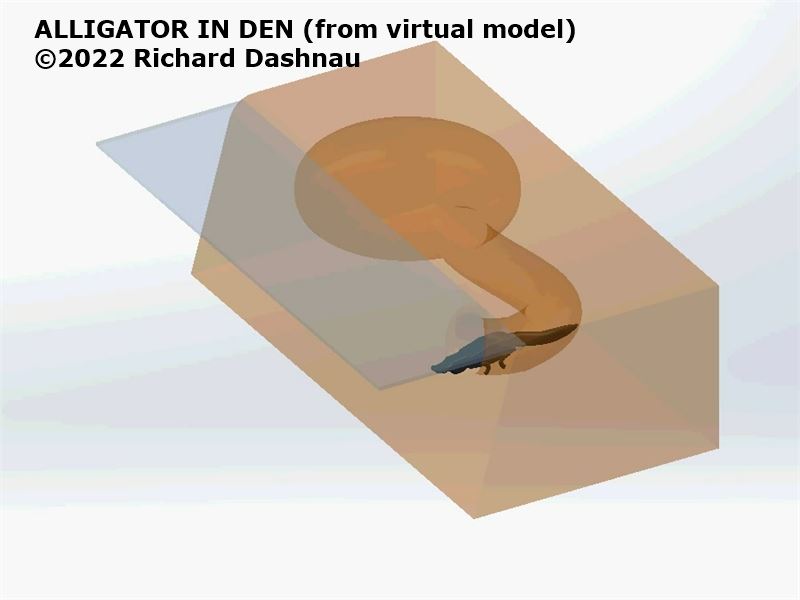
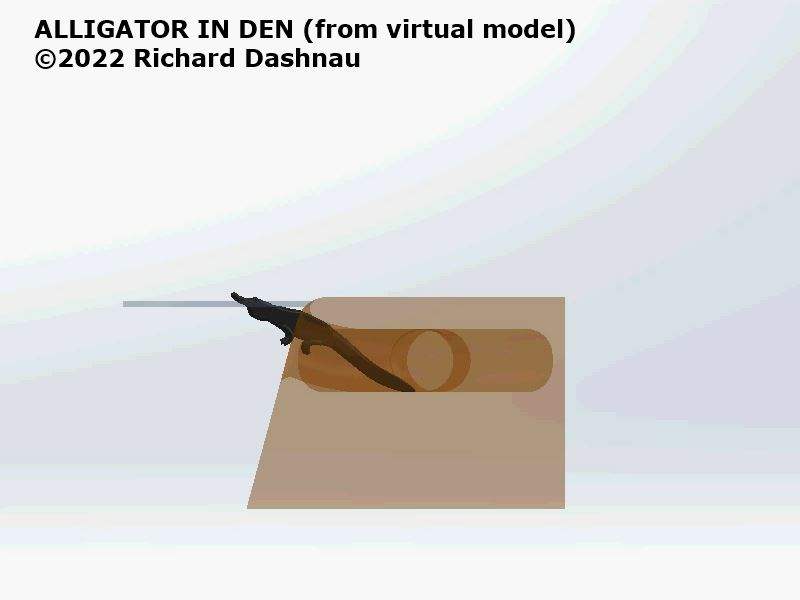
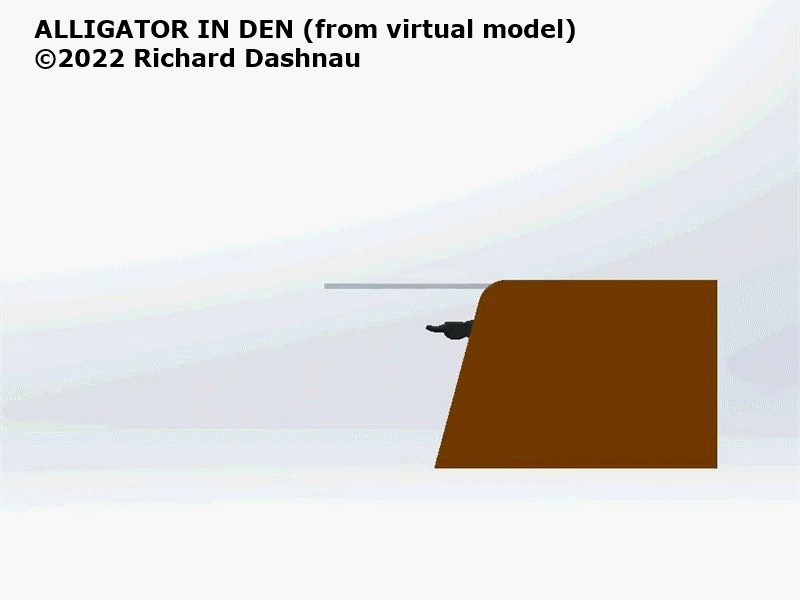
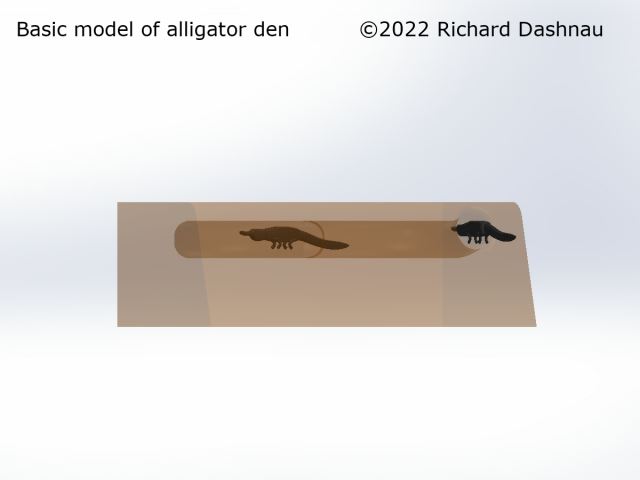
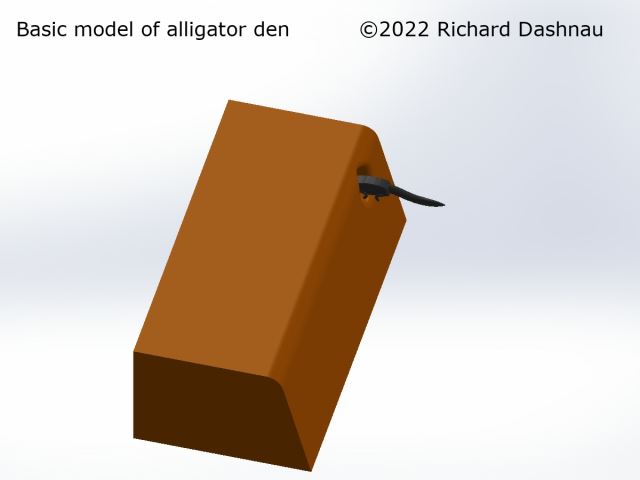
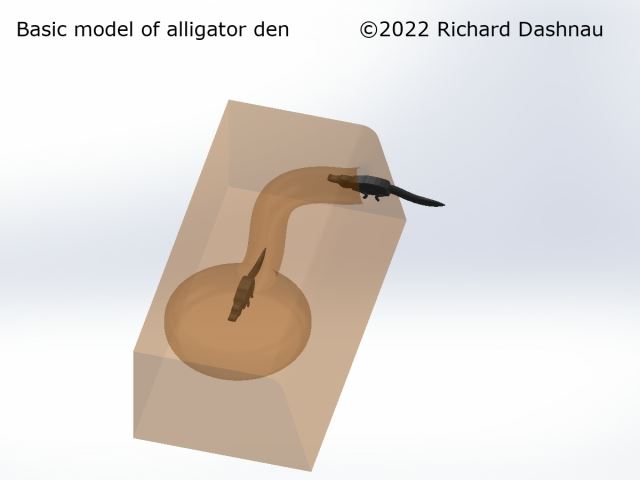
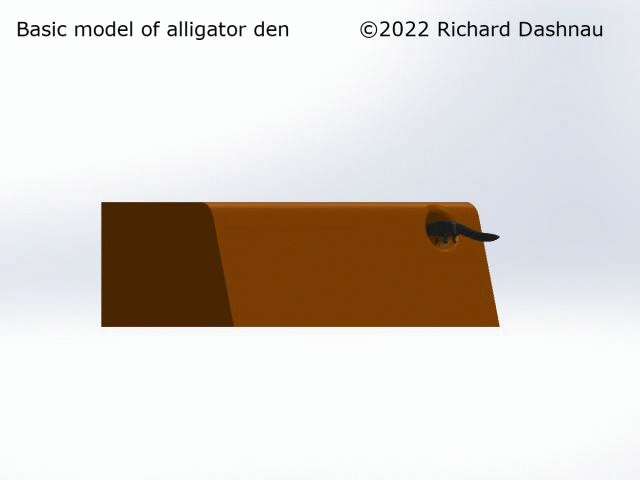
I modeled a piece of lake shore, and then put a den into it. I used den
measurements from information shared in various places by Dr. Anthony
Martin, and ichnologist that
works near the coast
of Georgia (USA). The den I made is an abbreviated general
arrangement. I kept
the tunnel section a bit short so the model would show better details
over all. That was part
1. I modeled a
thin sheet to represent the surface of the water. That was part 2.
I created the alligator last. I used one of my photos. First, I
"blacked-out" the gator in the image for high-contrast. Then
I copied that high-resolution alligator
silhouette into another sheet, and saved
that
image. I imported the image into Solidworks and traced over
it.
Then I extruded a
solid from that. I modified that to "round
it", taper
the tail, etc. (There are probably better ways to do this, but
I work with what I know).
I used simple extrusions for the "legs". That was part 3.
I added the 3 parts into a simple assembly. At this point, I wanted to
see how the model would work for later images. Maybe later I
can try animating an alligator
moving in the den. Next, I had
to figure out how to share this model outside
Solidworks so visitors to my
website could see it as a virtual model.
THAT turned out to be an interesting problem.
Although I
have access to all the
modeling functions of Solidworks (as far as I know),
export/sharing options are a bit different.
I tried
rotating the model, capturing screen shots at each view, and animating
that...or presenting single images. That's not the same as
playing with the virtual model, though.
I can, at least,
still export models/assemblies as a 3D pdf file. The 3D pdf allows for
full manipulation of the model in a virtual space, and there are also
functions on the document that allow
adjustment of lighting,
transparency (depending on how the model was exported) and even limited
cross-sectional views. These three files of different 3Dpdf exports demonstrate the differences
in
appearance. I've added a comment giving a brief overview of how to move
the model, but there are more options on the menu bar (including
turning transparency on/off, and even cross-sectional
views! You can
download the files to try them. 1) cross-sectioned model (floating here) 2) full-solid model rendered transparent 3) full-solid model...rendered solid.
There
were already issues with this, since the model "changes form" while
jumping file types. I had to tweak the model (and remove the water from
it) so the den would be acceptable as a pdf.
But I wanted to have a model on one
of my web pages
that a visitor could rotate and move around. The method had to
be
inexpensive, and one that I could learn by using my limited
knowledge.
From the methods that I found first I discovered that my original model
files would have to be converted to another format (STEP), and then I
discovered that it would have to be a
different format (OBJ). I
found a few spots online that would allow my to convert the
files
(I haven't found anything that I can afford that would do it locally on
my PC). Anyway, I took my converted
files and....discovered that
neither one would work with the solutions I found--or, I'd have to
upload files to an online repository, and then link to the files from
my page with script that would be
forwarded to me. I didn't really like much of that.
Then
I found a simpler solution in a module called "model-viewer"(and it's
FREE!). I
don't have to upload to another server, and the script is pretty
simple. BUT, it only accepts two other
file
formats (glTF or GLB). So, I
had to find another conversion. But I did, and then finally got the
module to work...and that's why this page is here. The model
shows on the page. It can be
manipulated. But, there are issues with
the range of motion in the converted model, and also with original
orientation of the model when the file is open. The OBJ and STEP files
work fine, though.
I'll have to figure that out, eventually. For
now, here's my first try, and at least it works. It took the
last
week or so of intermittent research and modification to make this
happen. The hours I spent
making
the model happened some weeks ago.
R. Dashnau 5/28/2022
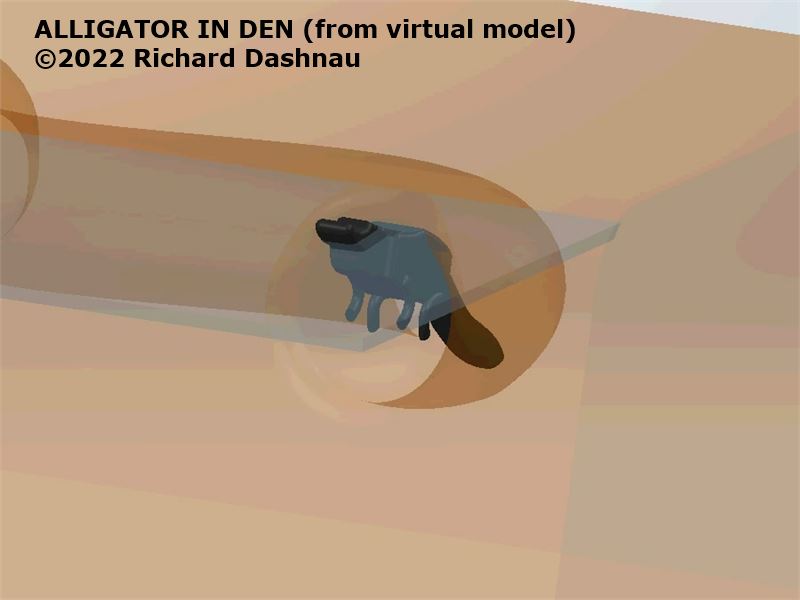
I
got the images below (and the anigifs) by taking screen shots while I
rotated the model in Solidworks this model had two gators, and no pond
surface.

One
of my motivations for doing this comes from various observations of
alligators in their dens. I thought I'd try to simulate the
situation based on images like those below. The rest of that female
alligator's body was hidden in the den behind her.
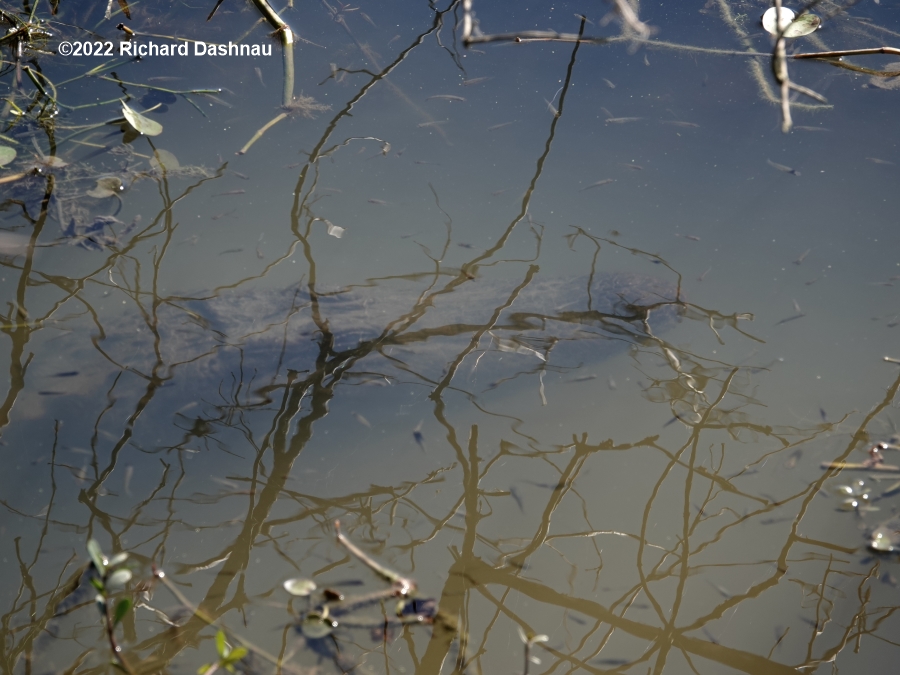
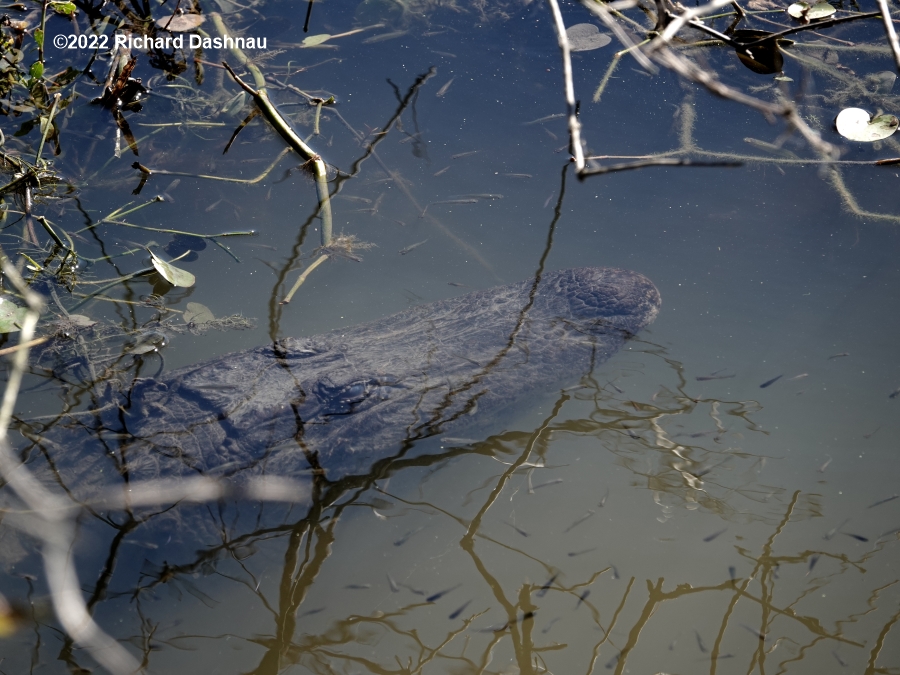
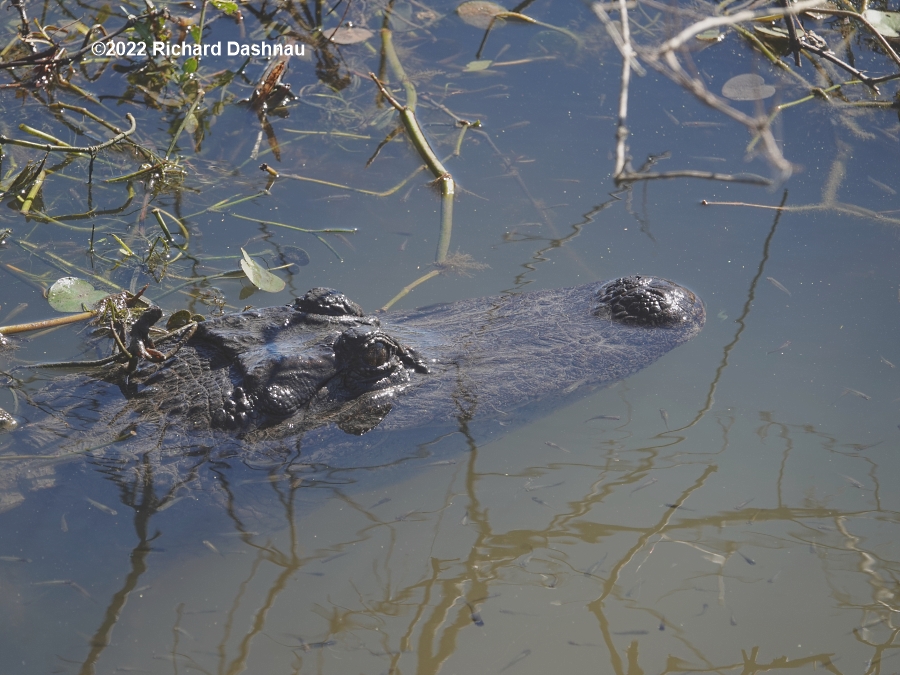
I
got the images below by taking screen shots while I
rotated the model in Solidworks this model had one gator, and the pond
surface. Once
I've made the model, I can generate various 2D images by shifting the
model around. If I am able to present indoor
programs
again, I could use this, or something like it in a digital program--if
I can't present the actual model If I make any further progress with
this concept, I'll try to note it here. (5/28/2022) The
animated gif for this one is just below.